
WHMCS clients can pay invoices in XRP through the Multicoin gateway (hosted page) or the Individual Coins gateway (QR code on the invoice). XRP settles in seconds with tiny fees. PayGate.to supports native XRP on the XRP Ledger: each order gets a one-time XRP address (no tag needed by the customer), and the XRP is forwarded to your own wallet, including your destination tag if your account needs one.
Step 1: Get an XRP wallet address
You need an XRP address you control (r…), from Trust Wallet or OKX Web3 Wallet. If your account needs a tag, write it as r…?dt=TAG or use an X-address. Details: Get an XRP address with a destination tag.
Step 2: Install or update the WHMCS plugin
Download the module from the WHMCS crypto module page, unzip it and upload the modules folder into your WHMCS root (use the latest version for XRP). Activate the gateways under Configuration › System Settings › Payment Gateways › All Payment Gateways.
Step 3: Paste your XRP wallet
Open Configuration › System Settings › Payment Gateways.
- Crypto Payment Gateway — Multicoin: paste your XRP wallet into XRP Wallet Address (XRP Ledger) and save. Clients click Pay with cryptocurrency and choose XRP.
- Crypto Payment Gateway — Individual Coins: fill in the XRP wallet field (one field per coin, loaded live) and save. Clients pick XRP and see the QR code on the invoice.
The field is labelled XRP Wallet Address (XRP Ledger). Leave every network you don't want empty.
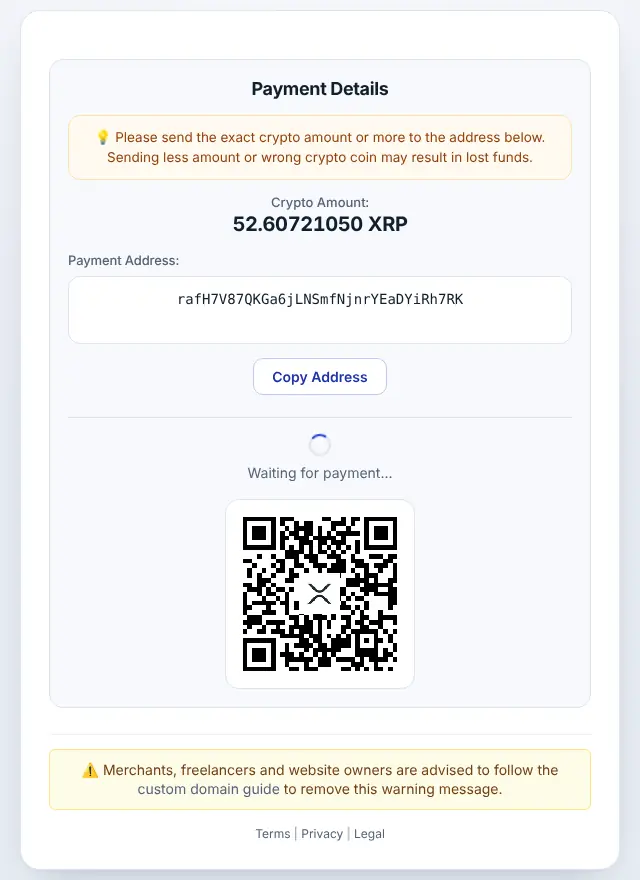
Step 4: What your customer sees
The customer chooses XRP, gets the exact amount converted from your order total, a one-time address and a QR code.
Step 5: Order completed automatically
When the payment is confirmed, the XRP is forwarded to your wallet and the invoice is marked paid. Each callback is recorded in the Gateway Log.
XRP on WHMCS: good to know
- Minimum: 2 XRP at the time of writing (live minimums). A new address needs 1 XRP reserve; the first payout covers it.
- Timing: XRP Ledger payments are final in a few seconds.
- Callbacks:
address_outlists your payout asr…?dt=TAG, even if you entered an X-address. - Set the WHMCS System URL to your public https address, and keep
/modules/gateways/callback/reachable. - Don't edit the invoice Notes while a crypto payment is pending: the module keeps its payment data there.
- In Individual Coins mode, a payment in a different token is still forwarded to you but the invoice isn't marked paid automatically. More in WHMCS troubleshooting.
- Order statuses: Unpaid → Paid; "Underpaid" entries appear in the Gateway Log.
Frequently asked questions
Do customers need to enter a destination tag?
No. They pay a one-time address without a tag. Only your payout wallet may have one.
Can I paste an X-address into the field?
Yes. The plugin accepts r…, r…?dt=TAG and mainnet X-addresses.
Do I need an account or API key?
No. The plugin only needs your public wallet addresses. Neither you nor your customers register with PayGate.to.
Which other platforms support XRP?
WooCommerce · Easy Digital Downloads · FOSSBilling · Magento · OpenCart · PrestaShop · Paymenter. See Accept XRP payments for the overview.