
Want crypto too? Our free WooCommerce crypto module is the only crypto payment gateway with instant payouts for Solana, Monero, Zcash and Bitcoin. Read the WooCommerce crypto guide.
What you need before you start
- A WordPress website with WooCommerce 5.8 or newer (WordPress 5.8+, PHP 7.2+ with the OpenSSL extension, which almost every host has).
- Your website must be online and reachable from the internet. Payment confirmations cannot reach a site running on localhost or behind a password.
- A USDC wallet address on Polygon (starts with
0x) from a self-custodial wallet. Step 1 shows how. - About 10 minutes. No sign up, no account, no API keys and no KYC.
Check that your business is allowed first: a short list of businesses cannot use the card gateway. See the prohibited businesses list.
Get your USDC (Polygon) payout wallet
Card payments are paid out to a USDC wallet on the Polygon network. That is a normal wallet address that starts with 0x. Payouts may arrive as USDC, USDT (Polygon or BEP-20), ETH or the POL native token, and the same address receives all of them.
- Use a self-custodial wallet that only you control, for example Trust Wallet, MetaMask, Rabby or a hardware wallet. You can create a free one in a few minutes with the Trust Wallet app on your phone.
- Copy your Polygon address (it starts with
0x, 42 characters).
Never use an exchange deposit address (Binance, Coinbase, Kraken and so on). Exchanges can freeze or lose payouts sent to deposit addresses. Also do not paste the USDC token contract address: it is not a wallet.
Install the plugin
You can install the plugin straight from your WordPress dashboard. Both options install exactly the same free plugin.
Option A: install from WordPress.org (easiest)
- In your WordPress admin, open Plugins › Add Plugin (called “Add New Plugin” in some WordPress versions).
- Search for Instant Approval Payment Gateway with Instant Payouts (by PayGate.to).
- Click Install Now, then Activate.
Option B: upload the zip file
- Download the zip from WordPress.org (or from GitHub).
- Open Plugins › Add Plugin and click Upload Plugin at the top.
- Click Choose File, select the zip and click Install Now, then Activate Plugin.
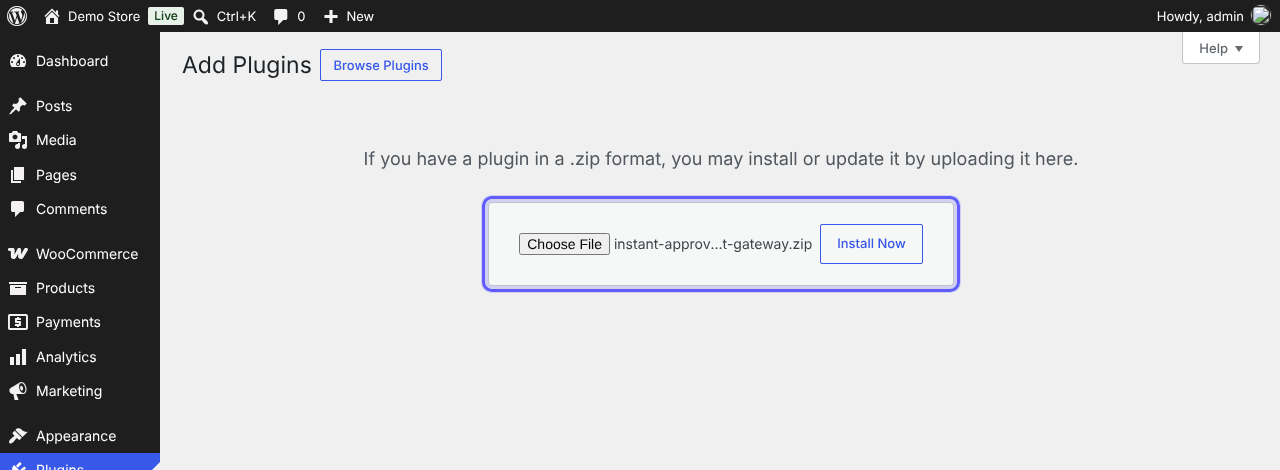
WooCommerce must be installed and active first: the plugin lists Requires: WooCommerce and, on WordPress 6.5 and newer, WordPress will not activate it without WooCommerce.
Activate the plugin
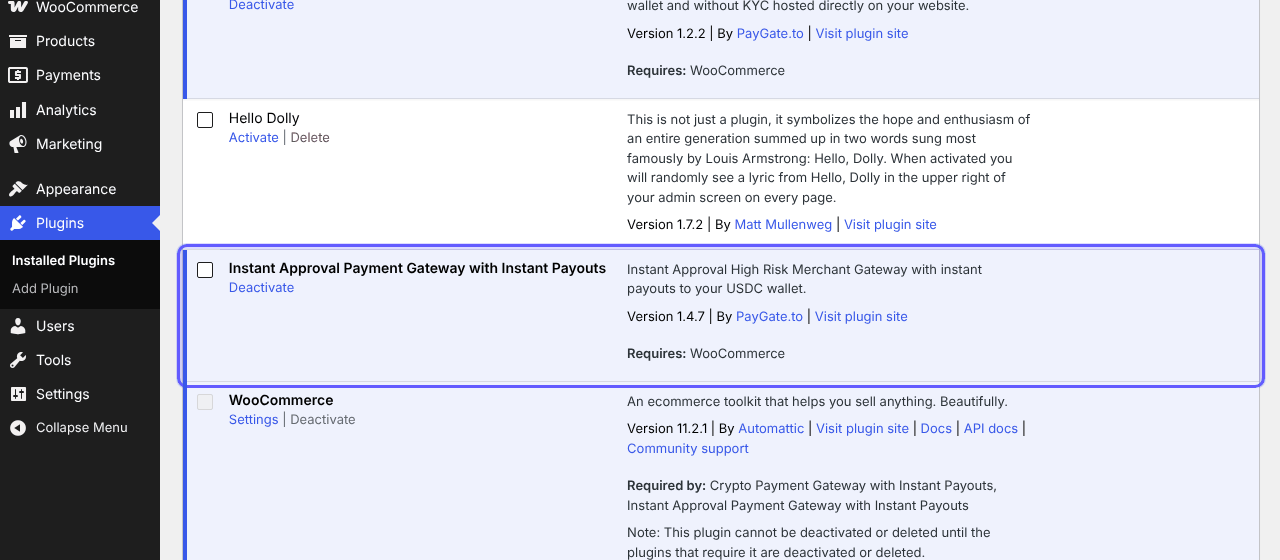
After installing, click Activate Plugin. You will find Instant Approval Payment Gateway with Instant Payouts in your Plugins list with a Deactivate link, which means it is active.
Open WooCommerce payment settings
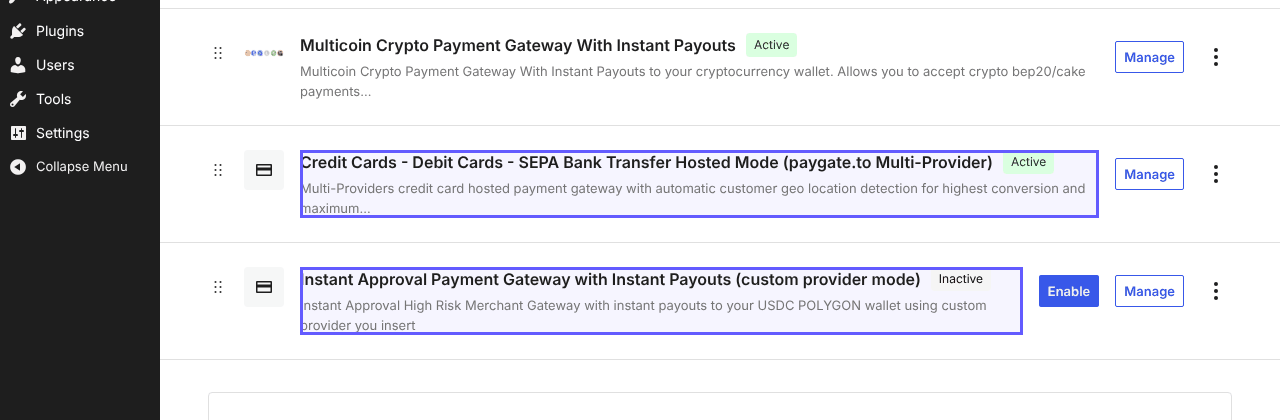
Go to WooCommerce › Settings › Payments. The plugin adds two payment methods:
| Payment method | What the customer gets |
|---|---|
| Credit Cards - Debit Cards - SEPA Bank Transfer Hosted Mode (paygate.to Multi-Provider) Recommended | A secure hosted payment page that offers every available card provider and automatically picks the best one for the customer’s country. Highest approval rate. |
| Instant Approval Payment Gateway with Instant Payouts (custom provider mode) | Sends the customer to one provider that you choose (for example MoonPay). Useful only if you want a specific provider. |
Click Manage next to the hosted mode.
Turn it on and paste your wallet
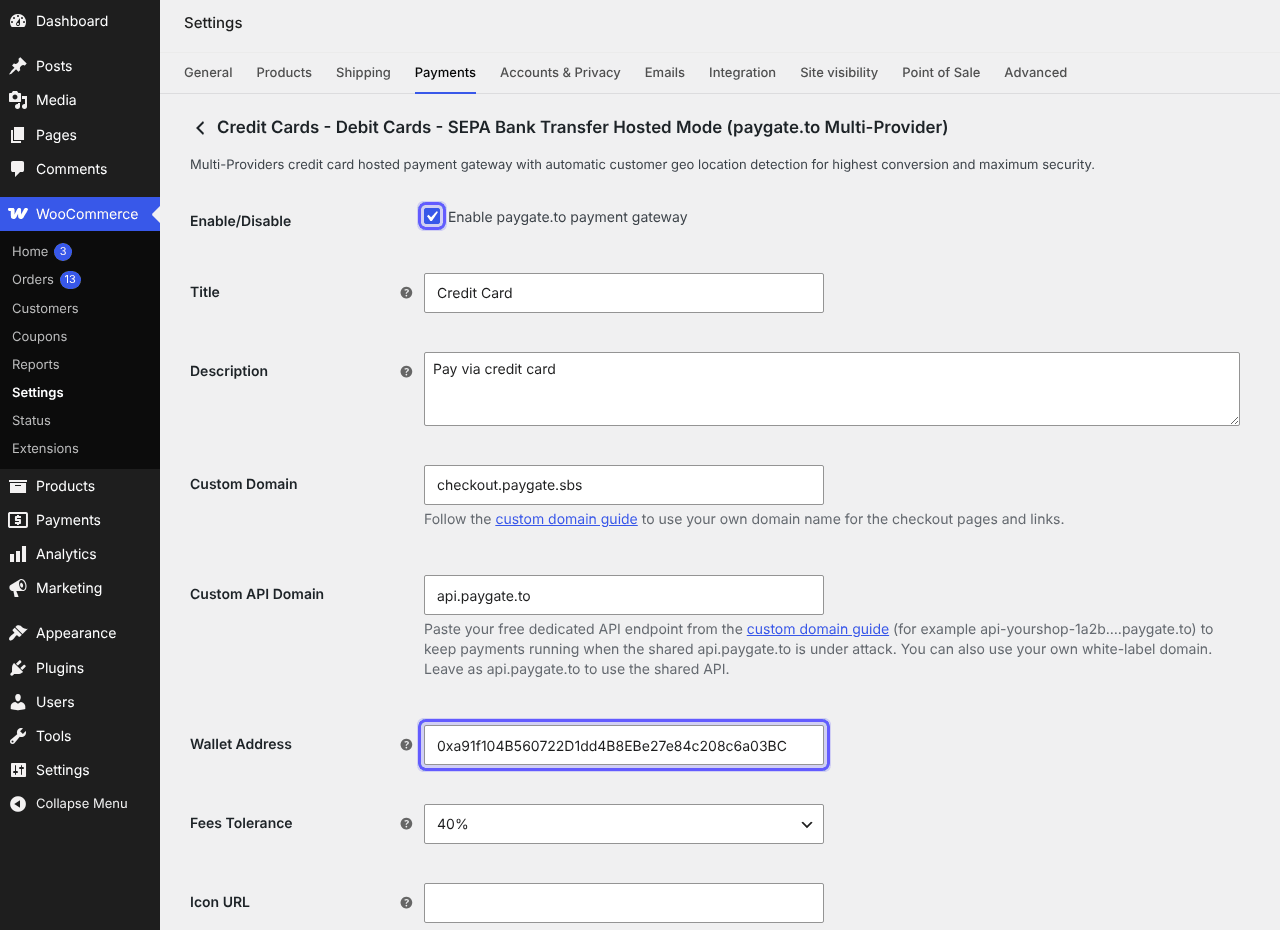
- Tick Enable/Disable (Enable paygate.to payment gateway).
- Title and Description are what customers see at checkout. The defaults (“Credit Card”) are fine.
- Leave Custom Domain (
checkout.paygate.sbs) and Custom API Domain (api.paygate.to) as they are for now. - Paste your Polygon address into Wallet Address.
- Scroll down and click Save changes.
If you see “Invalid Wallet Address: Please insert your USDC Polygon wallet address.” nothing on the page was saved. The address must start with 0x and must be your own wallet, not the USDC contract address.
Optional: fine-tune the payment page
Everything below is optional. The defaults work for most stores.
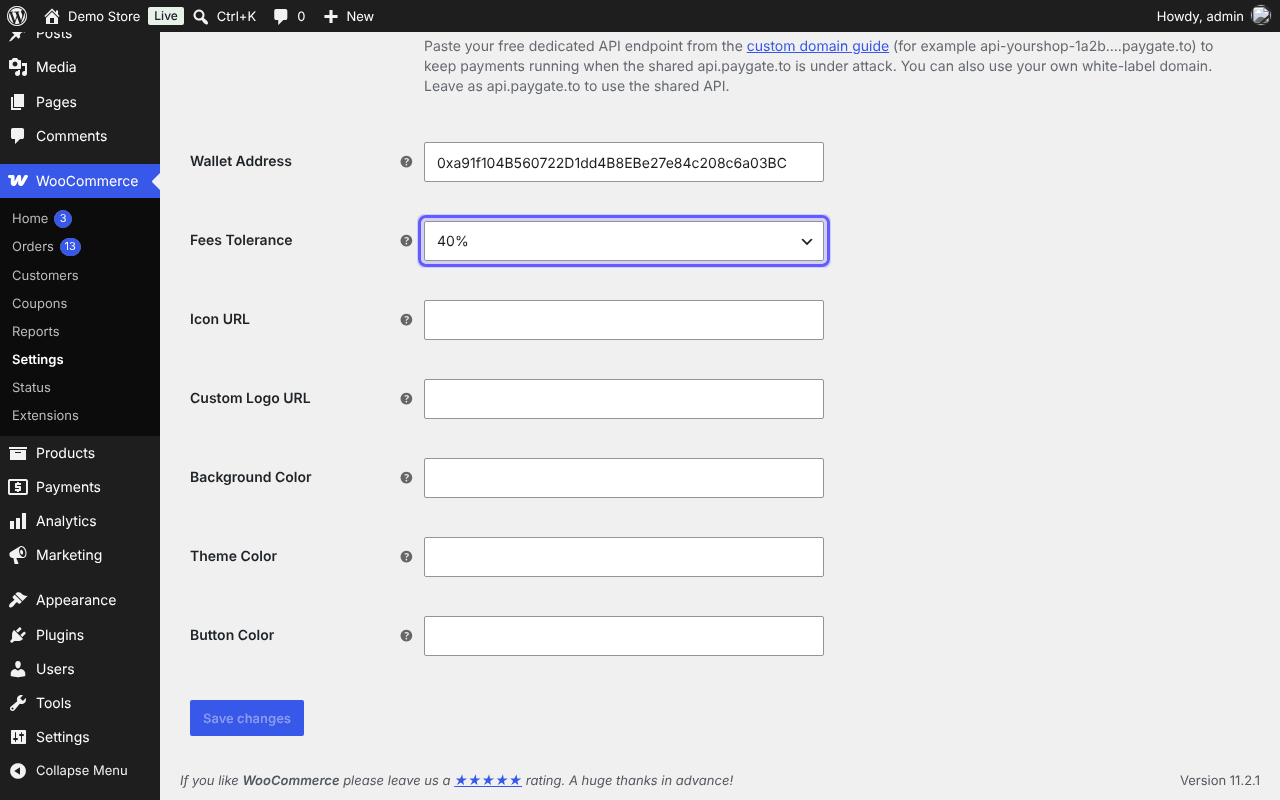
- Fees Tolerance (default 40%): how far below the order total a payment may be before the order is marked failed. Providers charge different fees, so a margin avoids failing honest orders while still catching customers who change the amount on the payment page.
- Icon URL: a small logo shown next to the payment method at checkout.
- Custom Logo URL, Background Color, Theme Color, Button Color: brand the hosted payment page with your logo and HEX colours.
- Custom Domain and Custom API Domain: run the payment page and the API on your own domain and get a free DDoS-protected endpoint. Follow the custom domain guide.
Only want one provider? (custom provider mode)
Open Instant Approval Payment Gateway with Instant Payouts (custom provider mode), tick Enable, paste the same wallet, then enter the provider’s tag in Custom Provider Tag (default moonpay, see the provider list) and its Minimum Amount in USD (default 15). If you enable both methods, give them different titles so customers can tell them apart.
Place a test order
Open your store in a private browser window, add a product to the cart and go to checkout. Your new card payment method appears with the title you chose.
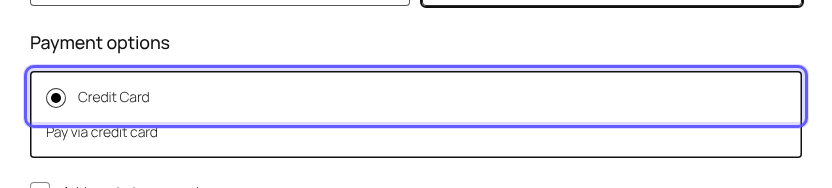
When the customer places the order, they are taken to the secure payment page where they pay with Visa, Mastercard, Apple Pay, Google Pay and other local methods. Card minimums range from about $1 to $30 depending on the provider (see the minimums), so test with an amount above the minimum.
The provider may ask the customer for a quick one-time verification on their first payment. That is handled entirely by the provider; you never need an account with them.
The order is marked paid automatically
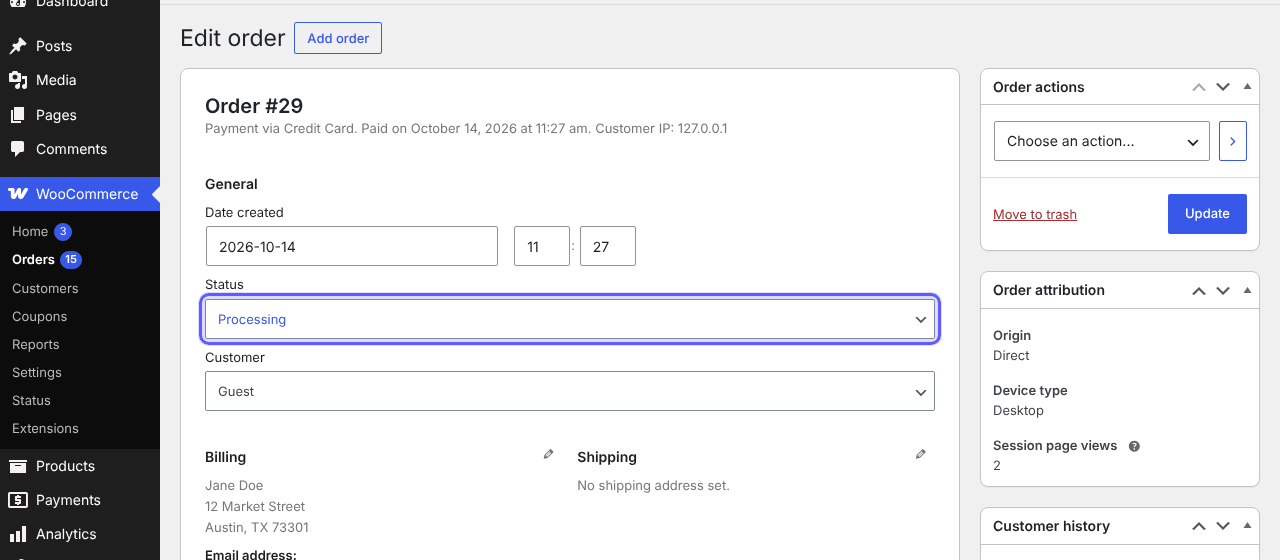
As soon as the payment is confirmed, PayGate.to sends a signed confirmation to your store, and the plugin moves the order from Pending payment to Processing. WooCommerce then sends its normal order emails.
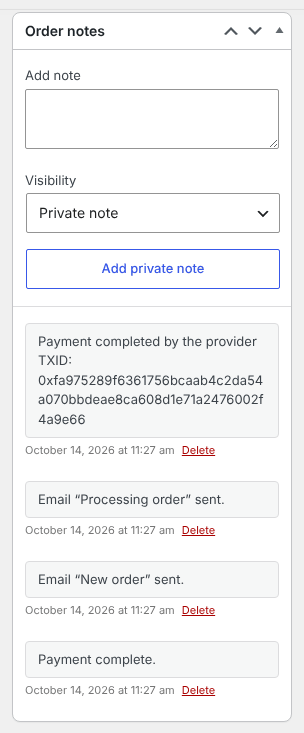
Your payout is sent to your wallet at the same time. You can follow any payment on the blockchain with the payout tracker.
All settings explained
| Setting | What it does | Default |
|---|---|---|
| Enable/Disable | Shows or hides this payment method at checkout. | Off |
| Title | Name of the payment method at checkout. | Credit Card |
| Description | Short text under the title at checkout. | Pay via credit card |
| Custom Domain | Domain of the hosted payment page. Change it only if you set up your own domain. | checkout.paygate.sbs |
| Custom API Domain | Your free dedicated API endpoint or your own white-label domain. | api.paygate.to |
| Wallet Address Required | Your USDC (Polygon) address that receives the payouts. | – |
| Fees Tolerance | How far below the order total a payment may be before the order is marked failed. | 40% |
| Icon URL | Image shown next to the method at checkout. | Empty |
| Custom Logo URL, colours | Branding for the hosted payment page (hosted mode only). | Empty |
| Custom Provider Tag | Provider used in custom provider mode. | moonpay |
| Minimum Amount | Smallest order total (USD) allowed in custom provider mode. | 15 |
How orders are updated
| Order status | When |
|---|---|
| Pending payment | The customer placed the order and was sent to the payment page. |
| Processing | The payment was confirmed (virtual and downloadable orders go to Completed, as usual in WooCommerce). |
| Failed | The amount received was below your Fees Tolerance. A note explains why, so you can review it. |
All card payments are final: there are zero chargebacks. Refunds, if you want to give one, are sent manually from your wallet.
Troubleshooting and FAQ
Checkout says "There are no payment methods available".
Make sure the method is enabled and the settings were saved with a valid wallet. If it still does not appear, your checkout page may be built with blocks that need a fix: follow this step-by-step guide.
The customer paid but the order is still Pending payment.
The payment confirmation could not reach your store. Your site must be public, and security plugins, firewalls or a CDN must not block requests to /wp-json/. Do not cache the /wp-json/ URLs. More fixes in the WooCommerce troubleshooting guide.
I get "Invalid Wallet Address" when I save.
Paste the public Polygon address of your own wallet. It starts with 0x. Do not paste the USDC token contract address or an exchange deposit address.
Which coins will I receive?
Payouts are sent to your Polygon address, usually as USDC. Depending on the provider they can also arrive as USDT (Polygon or BEP-20), ETH or POL. The same address receives all of them.
Do I need an account, API key or KYC?
No. There is no sign up, no account and no API key. Your wallet address is all you need. Never contact or create accounts at any of the listed payment providers; as a merchant you do not need one.
What are the fees?
1% plus the provider’s fees. Provider fees vary by provider and order amount. See the card gateway page for details.
Can a customer charge back?
No. Payments are final and you will not receive chargebacks; the provider handles the customer verification.
Can I show the payment page inside my site (iframe)?
No. Customers must be redirected to the payment page; payment providers do not allow their checkout inside an iframe.
Can I use my own domain for the payment page?
Yes. Follow the custom domain guide, then paste your domain into Custom Domain and your endpoint into Custom API Domain.
Other platforms and next steps
The same card gateway is available for every major platform:
Stuck? Our team replies fast.Send us your platform, a screenshot and the order number if you have one.
Chat with support