
Want crypto too? Our free OpenCart crypto module is the only crypto payment gateway with instant payouts for Solana, Monero, Zcash and Bitcoin. Read the OpenCart crypto guide.
What you need before you start
- OpenCart 4.0.2.0 or newer (OpenCart 3 is not supported).
- An admin account with permission to install extensions.
- Your store must be online: payment confirmations cannot reach a store on localhost.
- A USDC wallet address on Polygon (starts with
0x). Step 1 shows how.
Check that your business is allowed first: see the prohibited businesses list.
Get your USDC (Polygon) payout wallet
Card payments are paid out to a USDC wallet on the Polygon network. That is a normal wallet address that starts with 0x. Payouts may arrive as USDC, USDT (Polygon or BEP-20), ETH or the POL native token, and the same address receives all of them.
- Use a self-custodial wallet that only you control, for example Trust Wallet, MetaMask, Rabby or a hardware wallet. You can create a free one in a few minutes with the Trust Wallet app on your phone.
- Copy your Polygon address (it starts with
0x, 42 characters).
Never use an exchange deposit address (Binance, Coinbase, Kraken and so on). Exchanges can freeze or lose payouts sent to deposit addresses. Also do not paste the USDC token contract address: it is not a wallet.
Download the extension package
Download the extension package: paygatedotto.ocmod.zip. It is free and open source (source on GitHub).
Keep the file name exactly paygatedotto.ocmod.zip. OpenCart uses the name to install the extension, so a renamed file such as paygatedotto.ocmod (1).zip fails with “Invalid file type!”. Also do not use GitHub’s green Code › Download ZIP button: that zip is the source code, not the installable package.
Upload and install the package
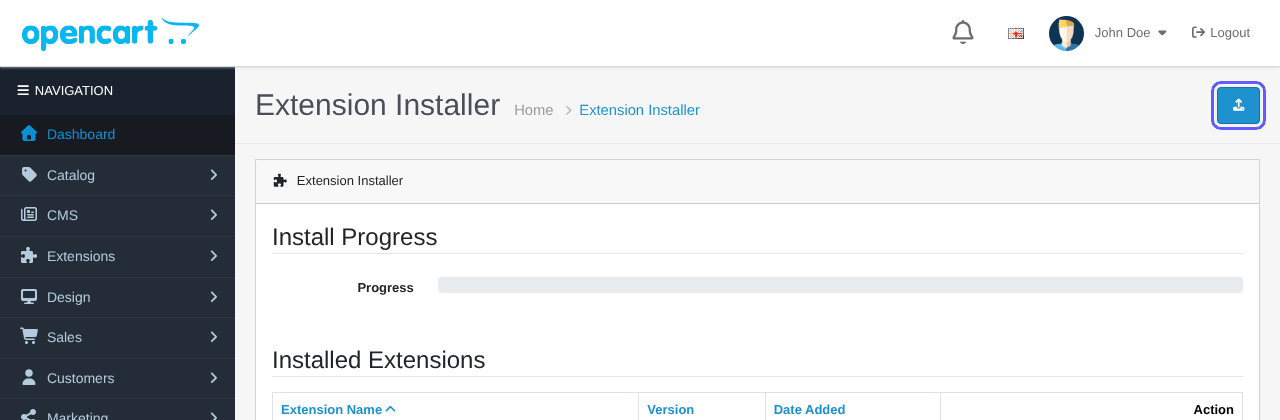
- In your OpenCart admin, open Extensions › Installer.
- Click the blue Upload button at the top right and select the
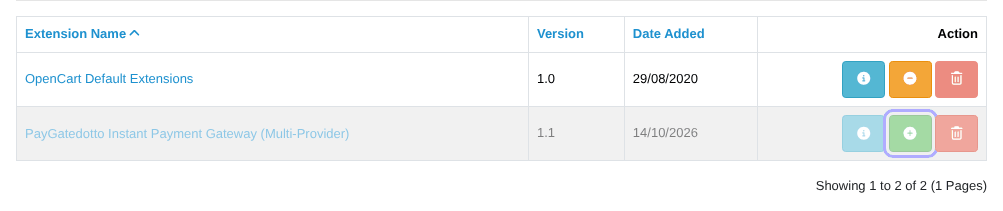
.ocmod.zipfile. - When the upload finishes, the package appears under Installed Extensions. Click the green + (Install) button on its row.
No modification refresh is needed: the package does not use OCMOD modifications.
Install the payment method
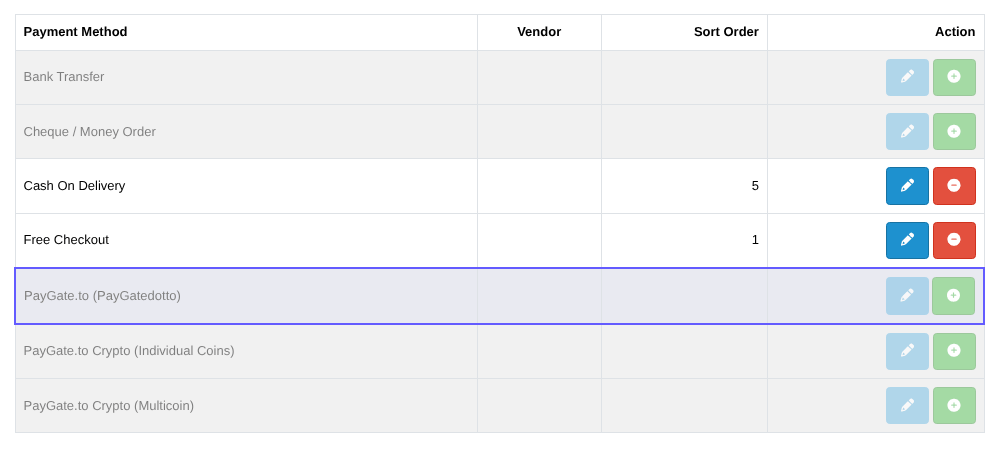
- Open Extensions › Extensions and choose Payments in the type list.
- Find PayGate.to (PayGatedotto) and click its green + (Install) button.
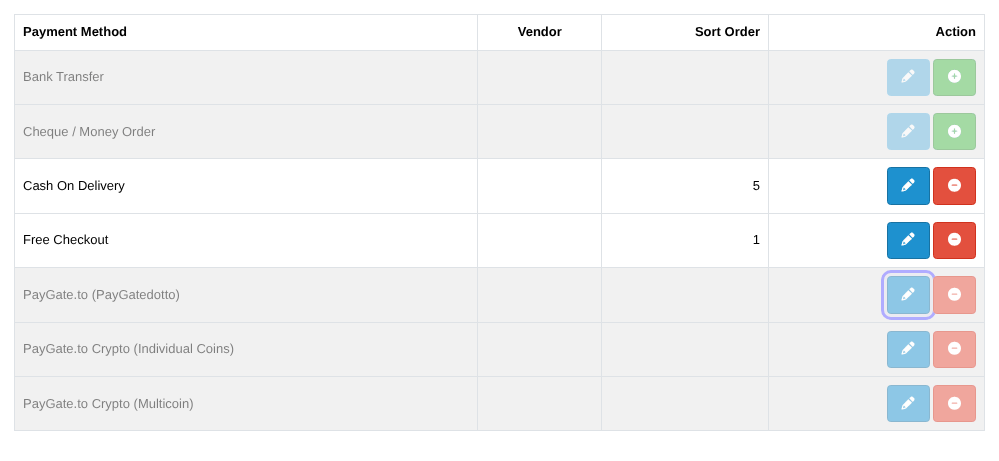
- Then click the blue pencil Edit button to open its settings.
Configure it and switch it on
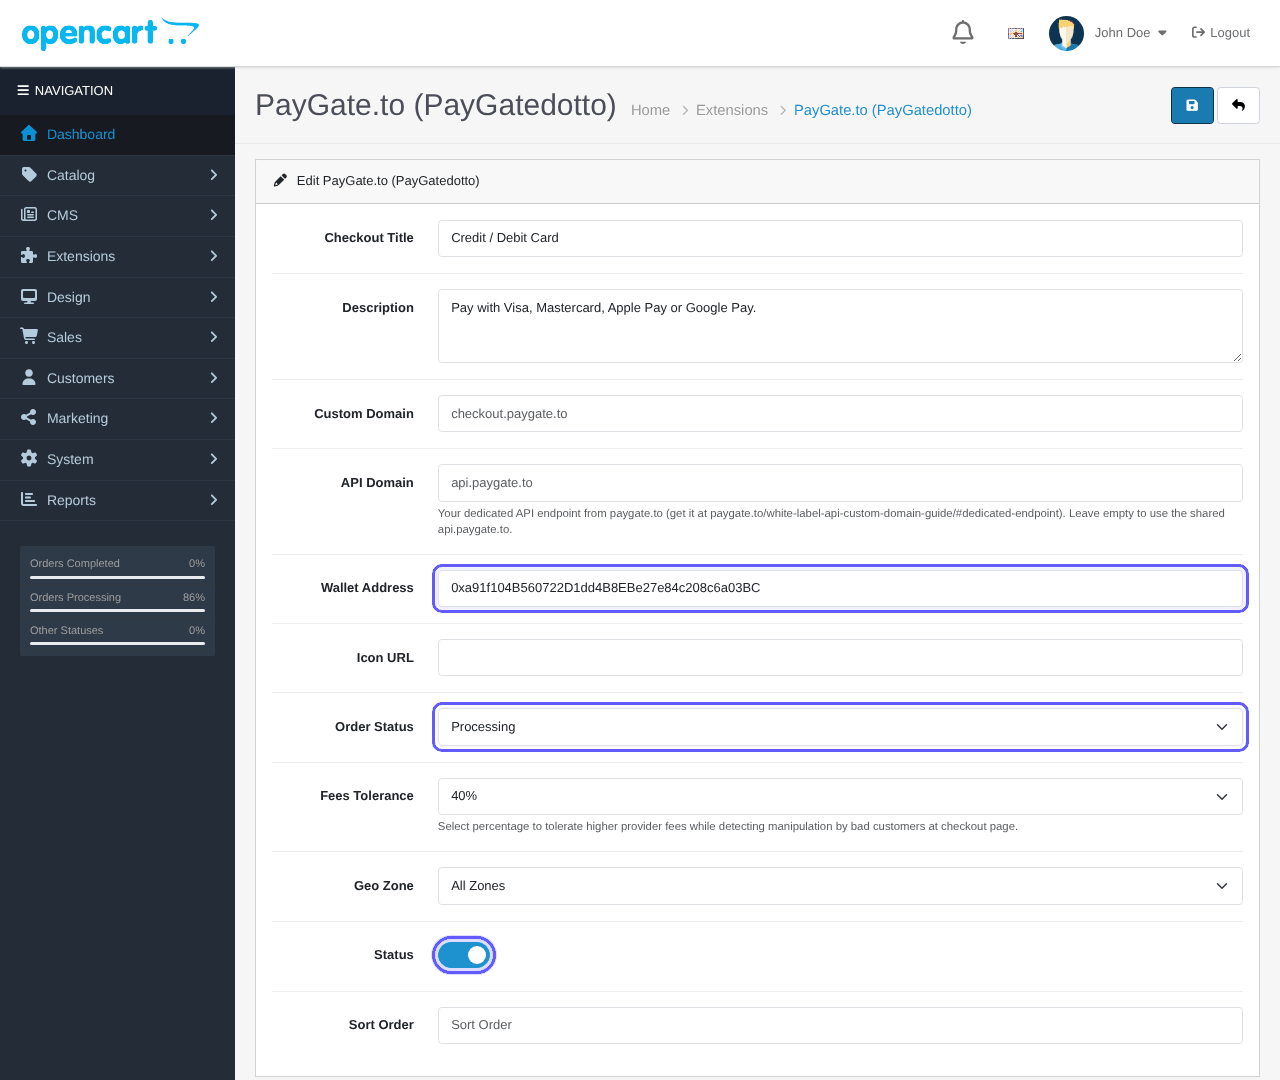
- Checkout Title: the name customers see, for example Credit / Debit Card. Do not leave it empty.
- Description: a short line shown before the Confirm button.
- Custom Domain and API Domain: leave empty to use
checkout.paygate.toandapi.paygate.to. - Wallet Address: paste your Polygon address.
- Order Status: the status set when the payment is confirmed. It is preselected as Processing; change it only if you use another status for paid orders.
- Fees Tolerance (40% by default): how far below the order total a payment may be before the order is marked Failed. Providers charge different fees, so keep a margin.
- Turn Status on and click the blue Save button at the top.
Place a test order
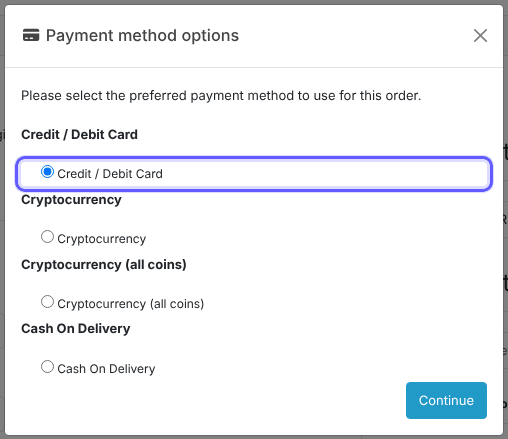
In a private browser window, add a product to the cart and go to checkout. After the address and shipping steps, choose your card payment method and click Confirm Order.
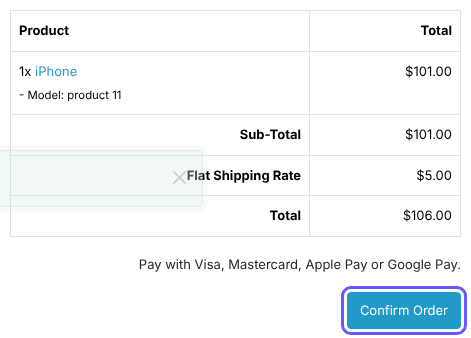
The customer pays on the secure payment page with Visa, Mastercard, Apple Pay, Google Pay and more. Card minimums range from about $1 to $30 depending on the provider (see the minimums).
The order is updated automatically
The order is created as Pending. When the payment is confirmed, it moves to the Order Status you chose and the customer is notified. The order history shows the payout transaction ID.
Every confirmation is signed by PayGate.to and the extension checks that signature first, so a forged or altered confirmation never changes an order.
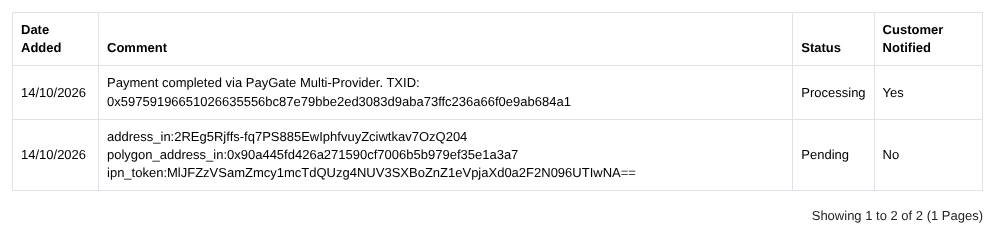
Your payout arrives in your wallet at the same time. Follow it with the payout tracker.
All settings explained
| Setting | What it does | Default |
|---|---|---|
| Checkout Title | Name of the payment method at checkout. | Empty: fill it in |
| Description | Text shown before the Confirm Order button. | Empty |
| Custom Domain | Domain of the hosted payment page. | checkout.paygate.to |
| API Domain | Your dedicated API endpoint. | Empty (uses api.paygate.to) |
| Wallet Address Required | Your USDC (Polygon) payout address. | – |
| Order Status | Status set when the payment is confirmed. | Processing |
| Fees Tolerance | How far below the order total a payment may be before the order is marked Failed (10% to 90%, or disabled). | 40% |
| Geo Zone | Limit the method to a geo zone. | All Zones |
| Status | Turns the payment method on or off. | Off |
| Sort Order | Position among the payment methods. | Empty |
How orders are updated
| Order status | When |
|---|---|
| Pending | The customer confirmed the order and went to the payment page. |
| Your “Order Status” (for example Processing) | The payment was confirmed. The customer is notified. |
| Failed | The amount received was below your Fees Tolerance. A note shows the TXID. |
Troubleshooting and FAQ
The payment method does not appear at checkout.
Check that Status is on, the Geo Zone includes the customer’s address and the Checkout Title is filled in.
Paid orders show the wrong status.
Open the extension settings, set Order Status to Processing (or your paid status) and save. Version 1.2 preselects Processing; older versions started on “Canceled”.
The installer says "Invalid file type!".
The file was renamed. Download it again and keep the name paygatedotto.ocmod.zip.
The installer says the file or extension already exists.
To update: note your settings and pick a moment when no card orders are waiting for payment. Uninstall the payment method, then in Extensions › Installer uninstall and delete the old package, and upload and install the new one. Uninstalling clears the settings, so install the payment method again and re-enter the Checkout Title, Wallet Address and Order Status, then switch Status on.
The customer paid but the order is still Pending.
Your store must be reachable from the internet and not in maintenance mode while it takes card payments. Also check that your store URL in config.php is your real public address.
Other admins cannot open the settings.
OpenCart gives permissions to the user group that installed the extension. Add the extension’s access and modify permissions to other groups in System › Users › User Groups.
Do I need an account, API key or KYC?
No. Your wallet address is all you need. Never contact or create accounts at any of the payment providers.
What are the fees?
1% plus the provider’s fees. There are no chargebacks: payments are final.
Other platforms and next steps
The same card gateway is available for every major platform:
Stuck? Our team replies fast.Send us your platform, a screenshot and the order number if you have one.
Chat with support