


Every coin your customer sends is forwarded straight to your own wallet the moment the payment is confirmed, with no holds, no sign up and no KYC. It works the same in all our plugins and modules: WooCommerce, Easy Digital Downloads, WHMCS, FOSSBilling, Paymenter, OpenCart, PrestaShop and Magento.
What you need before you start
- PrestaShop 1.7.7 or newer (tested on PrestaShop 8.2).
- Back-office access with permission to install modules.
- Your shop must be online and able to make outbound HTTPS requests (to load the live coin list). PHP needs OpenSSL.
- With SSL, turn on both Enable SSL and Enable SSL on all pages (Shop Parameters › General).
- A wallet address for each coin you want to accept. Step 1 explains which ones.
Prepare your payout wallets
Crypto is forwarded to your own wallet addresses, one for each coin or network you want to accept. Prepare them before you start:
- Bitcoin (BTC): your Bitcoin address (usually starts with
bc1). - Solana (SOL and Solana tokens such as USDC and USDT on Solana): your Solana address.
- Monero (XMR) and Zcash (ZEC): your Monero and Zcash addresses.
- Ethereum and EVM networks (ETH, ERC20, BEP20, Polygon, Arbitrum, Base, Optimism, Avalanche-C): one
0xaddress covers all of them. - Any other coin you want, for example Litecoin, Dogecoin, Bitcoin Cash, Tron (TRC20 USDT) or TON.
Use self-custodial wallets that only you control (Trust Wallet, Exodus, Phantom for Solana, Cake Wallet for Monero, a hardware wallet and so on). Never use exchange deposit addresses, and always paste the address for the right network: a Bitcoin address in the Bitcoin field, a Solana address in the Solana field.
Download the module
Download cryptopayment_gateway.zip. It is free and open source (source on GitHub). Do not unzip it.
Upload the module
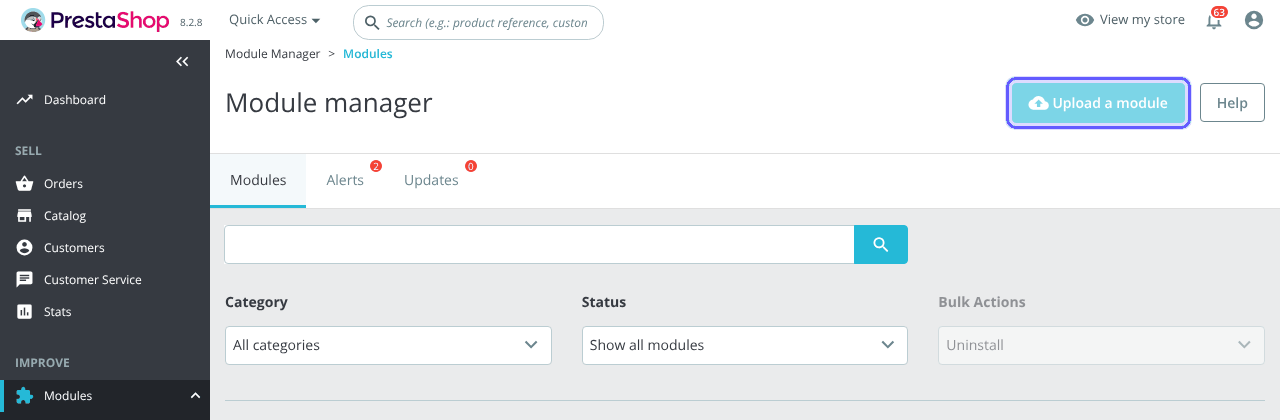
- In your PrestaShop back office, open Modules › Module Manager.
- Click Upload a module at the top right.
- Drop
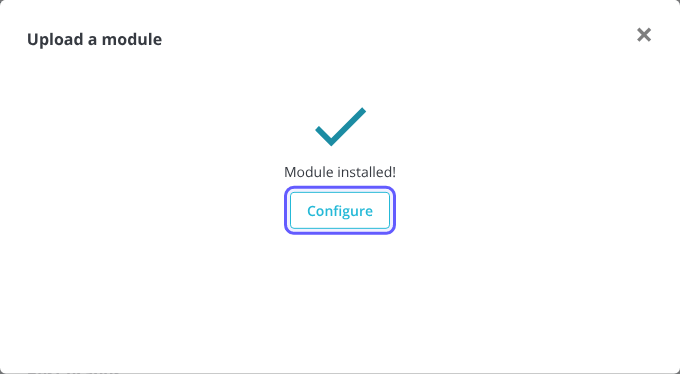
cryptopayment_gateway.zipinto the window (or click select file). PrestaShop installs it automatically and shows Module installed! - Click Configure.
Check the general settings
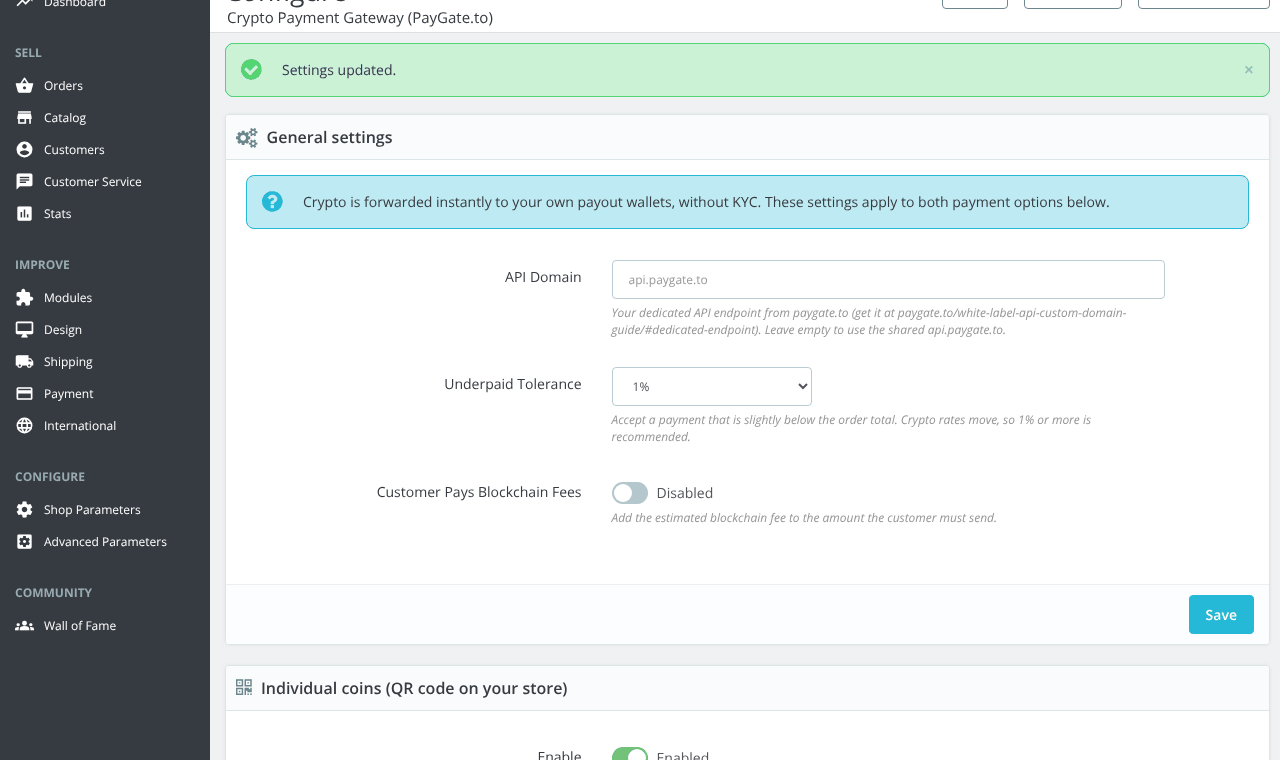
The Configure page has three panels. The General settings apply to both payment options:
- API Domain: leave empty to use
api.paygate.to, or paste your dedicated endpoint. - Underpaid Tolerance (1% by default): accepts a payment slightly below the total, because crypto rates move.
- Customer Pays Blockchain Fees: turn on if the customer should cover the network fee.
Set up individual coins (QR code on your shop)
In Individual coins (QR code on your store): switch Enable on, keep or change the Title, then tick every coin you want in Accepted Coins and paste its payout wallet.
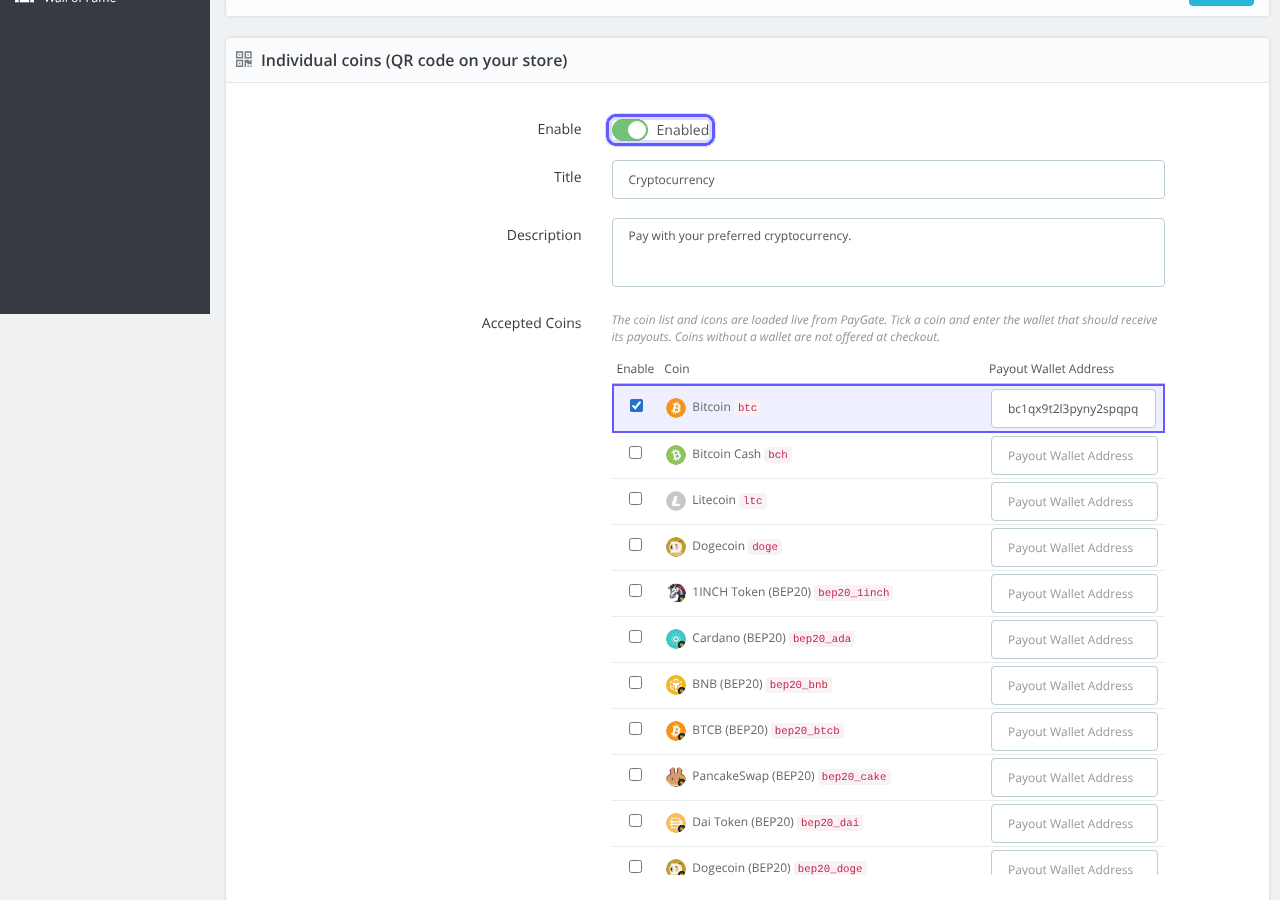
Nothing is saved if a field has an error. “Individual coins: enable at least one coin and enter its payout wallet address” means no coin has both the tick and a wallet yet.
Optional: set up Multicoin
In Multicoin (hosted checkout page), switch Enable on and fill in a wallet for each network you want:
| Field | Accepts |
|---|---|
| EVM Wallet (ETH, ERC20, BEP20, Polygon, Arbitrum, Base, Optimism, Avalanche-C) | ETH and EVM tokens |
| Bitcoin Wallet (BTC) | Bitcoin |
| Solana Wallet (SOL and Solana tokens) | SOL, USDC and USDT on Solana and more |
| Monero Wallet (XMR) | Monero |
| Zcash Wallet (ZEC) | Zcash |
| Bitcoin Cash, Litecoin, Dogecoin, Tron (TRX, TRC20 USDT), TON | One field each |
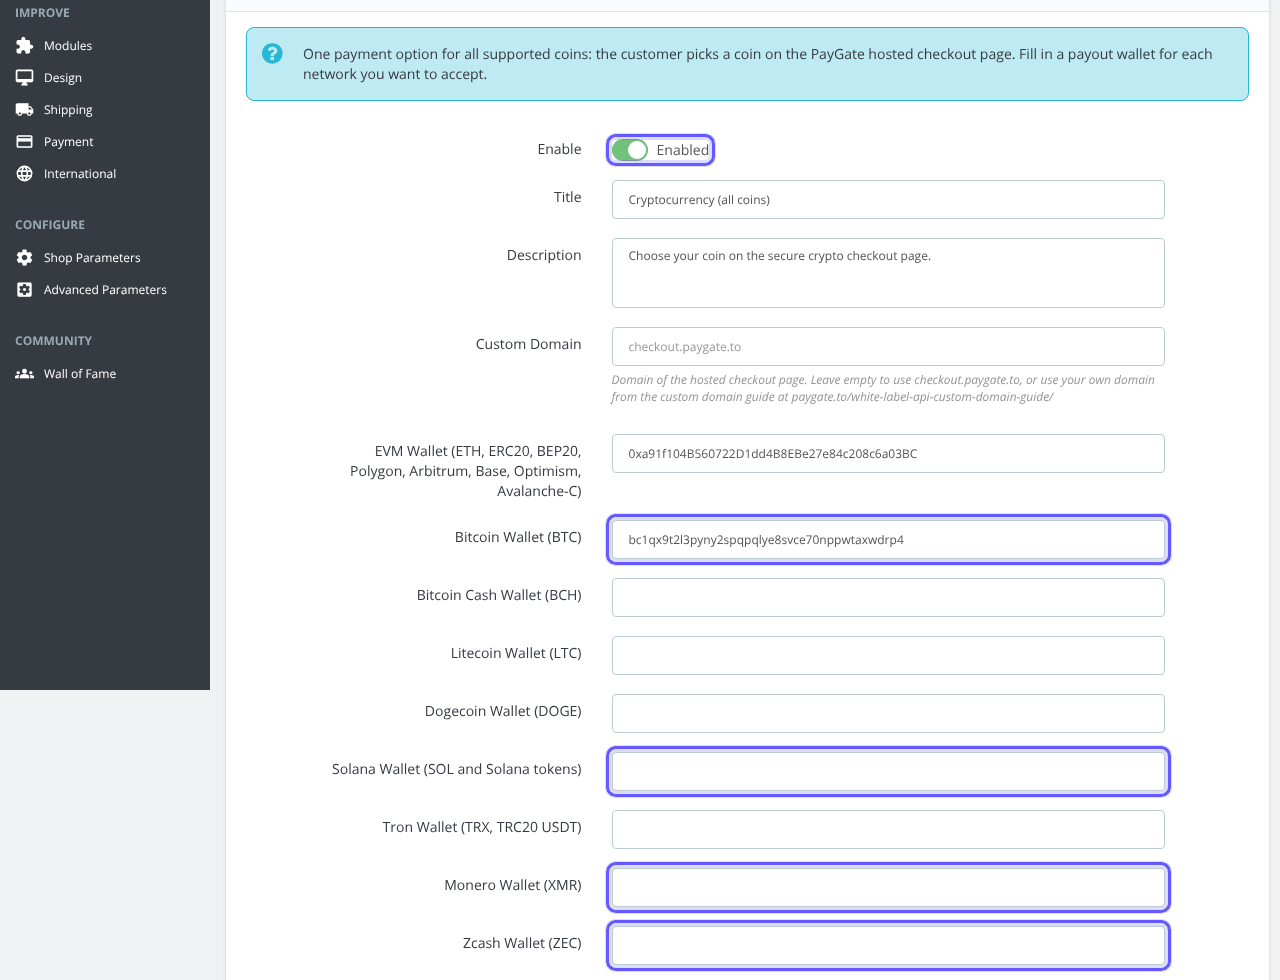
You can also add a Logo URL and colours for the hosted page, and a Custom Domain from the custom domain guide.
Place a test order
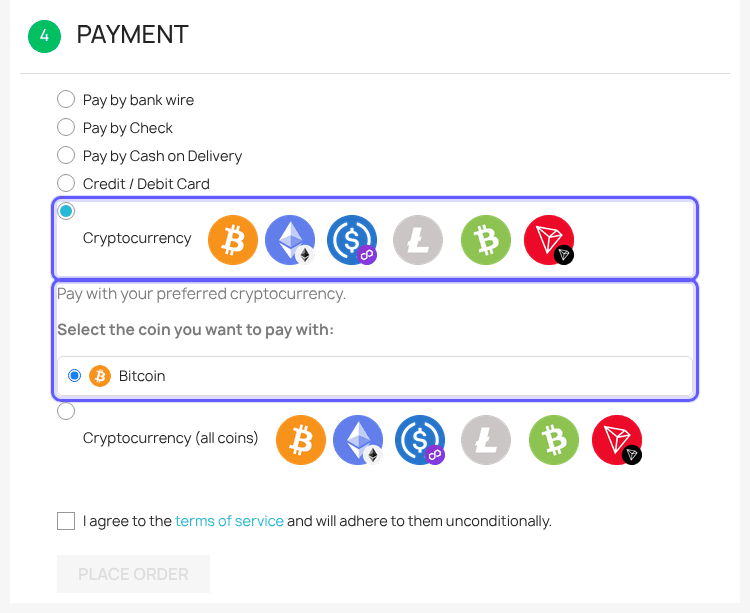
In a private window, add a product to the cart and check out. At the payment step choose Cryptocurrency, pick a coin, accept the terms and click Place order.
The order confirmation page then shows the payment box on your own shop: QR code, exact amount, the address with a Copy button and a live status. The amount is guaranteed for 3 hours.
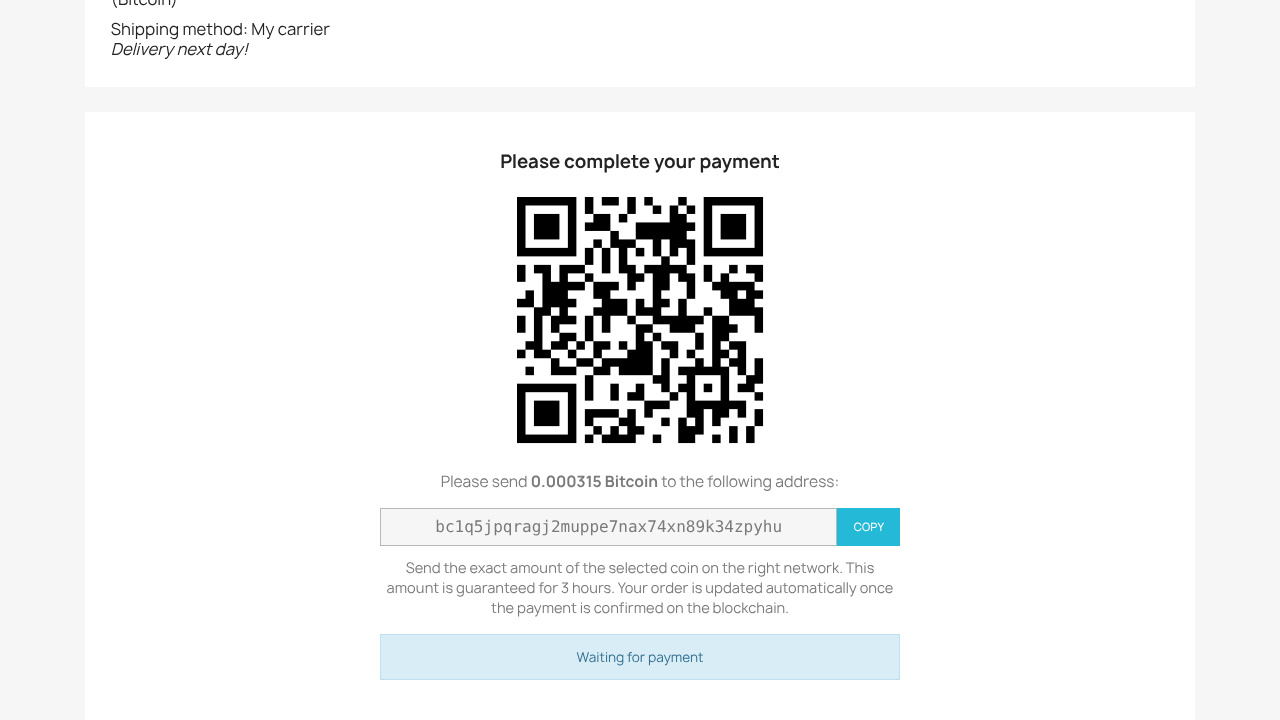
The same box appears in My account › Order history, so customers can come back to pay. Each coin has its own minimum: see the minimum per coin.
The order is marked paid and you are paid out
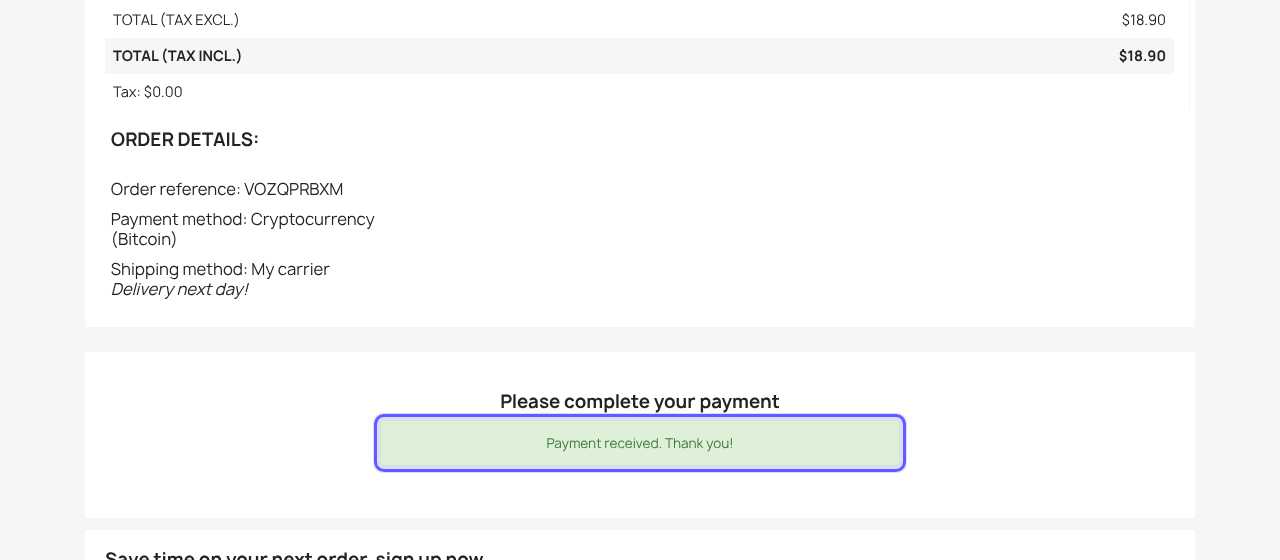
Once the payment is confirmed on the blockchain, the crypto is forwarded instantly to your wallet, the box shows Payment received. Thank you! and the order moves to Payment accepted.
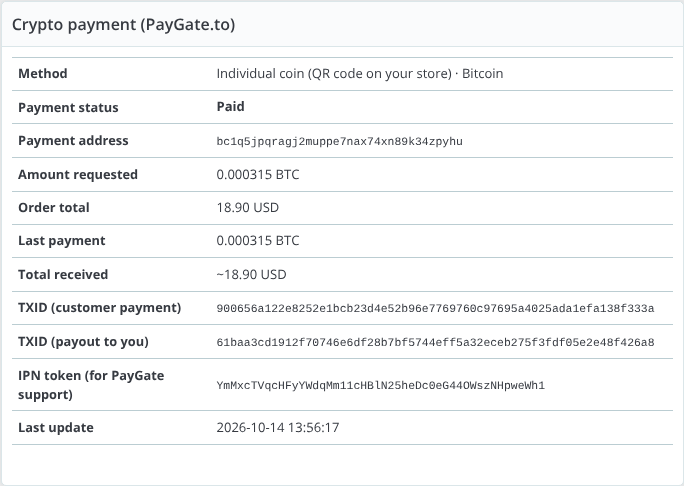
The admin order page shows a Crypto payment (PayGate.to) block with the status, address, amounts, the customer’s TXID, the payout TXID and the IPN token for support.
All settings explained
| Setting | What it does | Default |
|---|---|---|
| API Domain | Your dedicated API endpoint. | Empty (api.paygate.to) |
| Underpaid Tolerance | Accepts payments slightly below the total (0% to 10%). | 1% |
| Customer Pays Blockchain Fees | Adds the estimated network fee. | Disabled |
| Individual coins: Enable, Title, Description | The QR-code payment option. | Off, Cryptocurrency |
| Accepted Coins | Tick a coin and enter its payout wallet. | None |
| Multicoin: Enable, Title, Description | The hosted checkout option. | Off, Cryptocurrency (all coins) |
| Custom Domain (Multicoin) | Domain of the hosted checkout page. | checkout.paygate.to |
| Network wallets (Multicoin) | One wallet per network. | Empty |
| Logo URL, colours (Multicoin) | Branding for the hosted page. | Empty |
How orders are updated
| Order status | When |
|---|---|
| Awaiting crypto payment | The order was created with its payment address (the module adds this status). |
| Payment accepted | The full amount was received (within your tolerance). |
| Payment error | Less than the amount due. The customer can send the rest to the same address (for individual coins the payment box asks for it) and the order completes automatically. |
Payments to the same address add up, and an order you already shipped is never changed back by a late payment.
Troubleshooting and FAQ
Is Monero, Zcash and Solana really supported with instant payouts?
Yes. PayGate.to is the only crypto payment gateway with instant payouts for Solana (SOL), Monero (XMR), Zcash (ZEC) and Bitcoin (BTC), in PrestaShop and every other module.
The crypto option does not show at checkout.
Check that the option is enabled and has at least one wallet (individual coins: tick and wallet). Also make sure the cart currency is ticked for the module in Payment › Preferences, especially for currencies you added later.
The settings say the coin list could not be loaded.
Your server could not reach PayGate.to. Reload in a moment; saved coins are kept. If it continues, allow outbound HTTPS to api.paygate.to.
The customer paid but the order is still awaiting payment.
Make sure the shop is public and that, if you use SSL, both Enable SSL and Enable SSL on all pages are on. Confirmations still work in maintenance mode.
The customer sent too little.
The order gets Payment error. For individual coins, the payment box asks the customer to send the rest to the same address, and the order completes automatically when it arrives.
Which PrestaShop versions are supported?
PrestaShop 1.7.7 and newer, including PrestaShop 8.
What are the fees?
1.5% flat rate plus blockchain fees.
Other platforms and next steps
The same crypto gateway is available for every major platform:
Stuck? Our team replies fast.Send us your platform, a screenshot and the order number if you have one.
Chat with support